Showing posts with label To Create. Show all posts

November 22, 2013

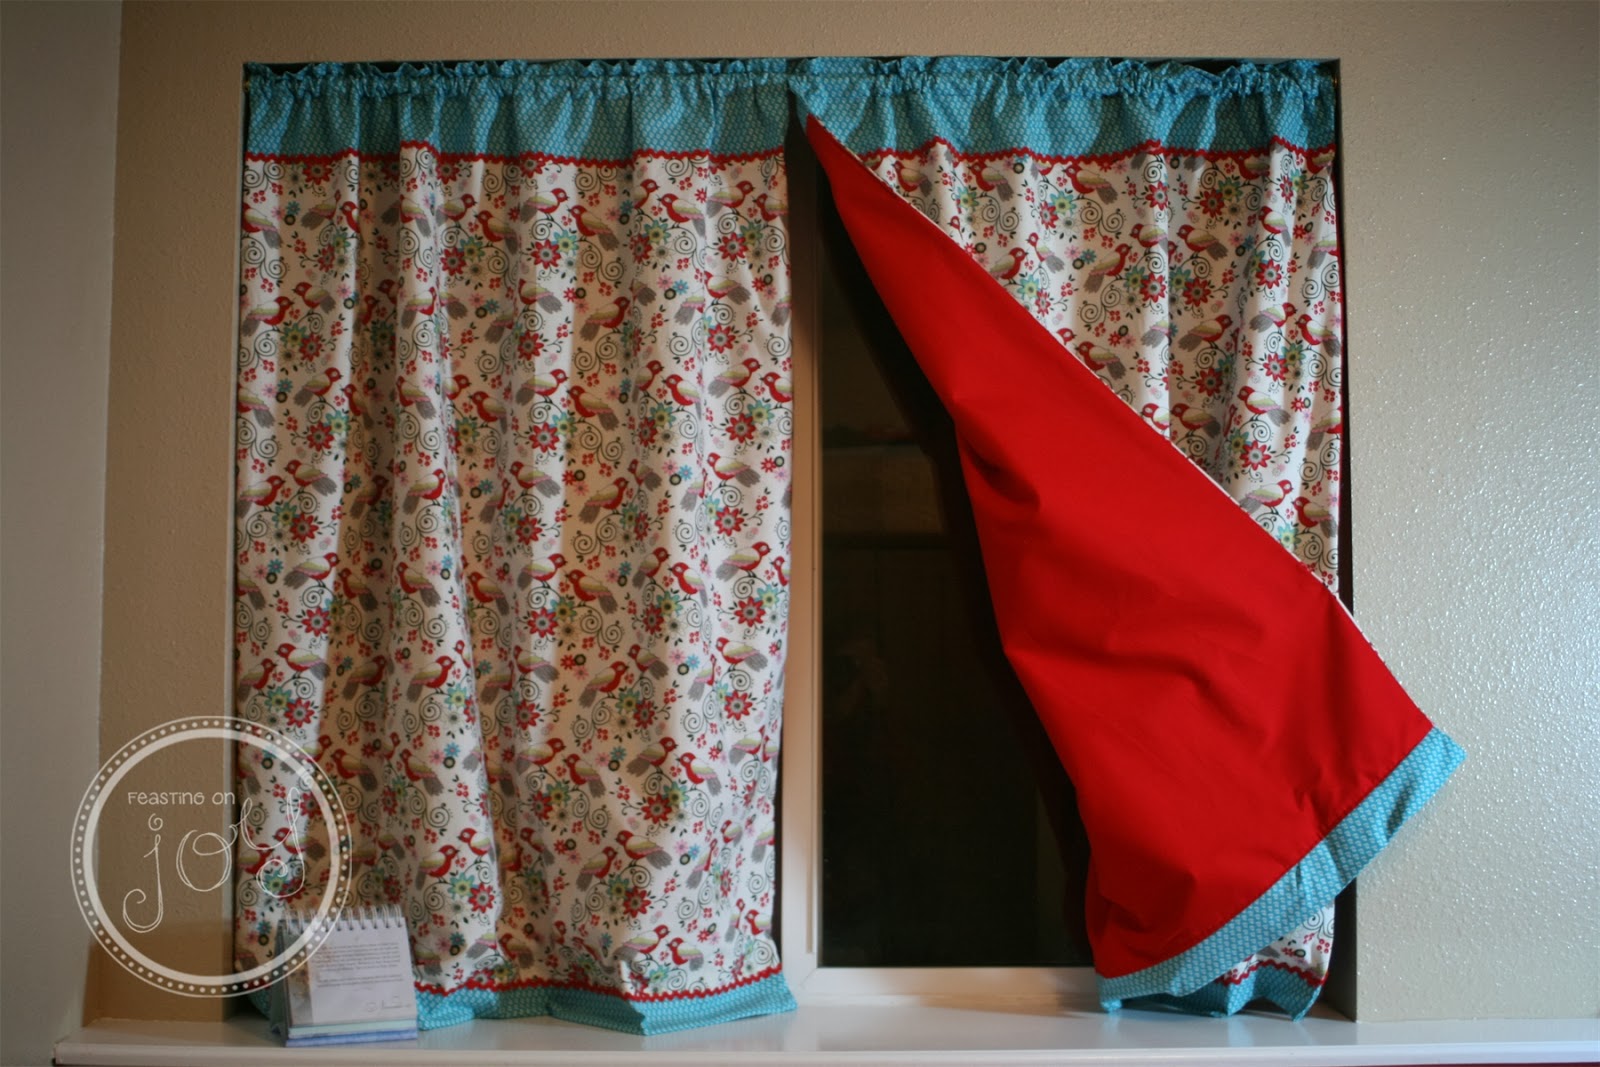
I made new craft room curtains!

It has been so much fun to get back into sewing here and there again. I used to sew a lot. I am decent at making anything but clothes. I tried clothes and the dress I made was hideous and fit terribly. Not my thing. So I will stick with home decor and other items for now.

The material I showed you a couple of days ago here:
"Time to create again!" has been transformed into one of my favorite home decor items yet. I made curtains for my craft room.

I am slowly getting my craft room in order and this was one big thing I needed to complete. I had to make these curtains with a liner because it gets cold here. The windows let in a lot of cold air and let the heat escape through them so liners help with that.

Here is what they look like...
They are so bright and cheery for the room and they have two of my favorite colors in them - blue and red!


The only thing I still want to do is sew button holes and three buttons on each outer edge so that when you open the curtains you can do it by buttoning the buttons in the holes.  I will do this instead of having ties or hooks.  That will probably get done in the next 9 months - Ha!


Here is a close up of the material. I just love it.  I am already starting to get some cute decorations to go with these curtains too! I bought a sign that is turquoise and says "It is well with my soul."  I also got a wire flower wall art that has teal flowers!  Sorry for all the exclamation points (one of my pet peeves) but I really am excited about the addition of these curtains. I actually went downstairs to the craft room the morning after I finished the curtains to just look at them.

Thanks for sharing in my excitement.

~Blessings~

November 19, 2013

Time to create again!

I am so excited to share with you my latest project. I bought this material in our local mountain town in May and intended to use it soon after that. Life happened and I am just now getting to my creation! Time flies and I cannot believe it has been almost seven months since I have had it.

I absolutely LOVE this material and the color combination and really love how the final project turned out. Stay tuned this Friday for the big reveal of what I did with these beauties.


~Blessings~

September 6, 2013

My BIG Summer Project

Usually when summer hits I have a long list of fun projects I'd like to do as well as a list of summer activities. This year, since I was so sick most of the first part of the year, I think I was making up for lost time. I put a lot of the project plate and when all was said and done some projects have moved to the "fall project" list. I managed to finish one really big (to me) project on my list though and our family will benefit from it for years to come. Yay!

One of things I have been wanting and looking for for quite a while has been a school room table. It couldn't be too big or too small. It had to be the right shape and durable. It also had to fit the decor in the school room. I looked and looked and the tables I was finding were either too much money or not exactly what I wanted. I tend to be pretty picky with certain things. This was one of them. I ended up going to some thrift stores and that gave me the idea to buy a low cost table and refinish it.

Bright idea right? I thought so. I had never refinished anything like that in my life. I have built a full size bed frame out of wood before (of course with my Dad's help) but never stripped paint, sanded and repainted a piece of furniture.

I thought that this would be a quick two week project and really that it would take no time at all. I mean after all I saw pinterest ideas everywhere and it only took them two weeks to do a project like this right? No way. I was deceived!

I purchased the table from a person off craigslist and I think it is actually an antique drop leaf table. It also came with four chairs. I will tackle refinishing those in another lifetime! No really I will try and get that done in about a year. No rush on those. Here is the table before. (I had already started disassembling it when I realized I needed to take pictures.)

 These puppies will be getting refinished at a later date. I just could not do them this summer. It would have taken me 300 more hours. I picture these to be the same color as the finished table with fluffy red tie cushions on them.

I started by stripping the white paint off the bottom portion of the table. Easy job right? NO! It took forever. The person who painted this table before painted over dark brown paint that was already there. Because there were two layers of paint I essentially had to go over the table two times with jasco paint stripper, a putty knife (for a scraper) and steel wool. To strip the paint off this portion of the table it literally took me over 40 hours!  The little rings on the table legs (that are decorative) took forever because I had to get into every nook and cranny to strip it otherwise the new paint would show the imperfections. I realized after stripping the first portion of one of the legs this is no two week job! Part of it is my fault too because I just can't do a half done job. I couldn't have painted over what was there. The finished project would have been cheesy. I felt like this truly was an investment and wanted to do it right.

Here is the beginning of the table being stripped of it's paint. Many, many hours went into sitting on the concrete floor of the garage with goggles and mask on stripping away at the yucky white paint.

Thankfully, my husband was feeling physically up to helping me sand the tops of the tables. He has previous professional experience restoring Corvette's so he knows all about sanding as well as refinishing. He did an excellent job sanding and I am so glad. I tried it once when I discovered a section that needed to be done and stunk at it! He helped me out soo much. I was praising God that his back was feeling up to that kind of work too.

Once those were sanded and the table was stripped of all paint, then I had to take tack cloth and get all the fine debris off so it wouldn't get into the new paint.  I knew the colors I wanted to paint the table because I wanted it to match our school room and the shelves I made covers for last year.


One of the funnest parts was picking out the paint. I had never done that before either. I learned A LOT. I was so grateful for my Dad's help (who was a general contractor most of his career and is an expert in all things building and more.) He guided me through what I would need for this project. He also helped me to choose paints that he knew would be durable (for little boys sitting at a table and doing school work on it almost every day) and wipeable. I know marker or paint was bound to get on it and I wanted to make sure I could just wipe it down with a damp cloth and it would not be ruined.


I started the project in May and finished it one week before school started at the end of August! I didn't work on it every single day but pretty much every week of the summer I was doing something with the table. I learned a lot and it felt like a wonderful accomplishment in the end. For the red I had to paint three coats on everything and the blue needed two coats. It really required some perseverance and there were many times I was thinking, "What did I get myself into?" However, now, we have a sweet table we can use for our school room for years to come and when the school season of our life is over I can use it for a craft table. I don't think I will ever get tired of the colors because blue and red are my two favorite colors. I also really love the drop leaf part of it. It works so well in our school space because we can make the table big or small.

Here I am putting the table back together in the school room
Cody was really excited and being the builder that he is he helped my put all the screws in. He's good at it too. His dexterity at 3 amazes me sometimes. I realized as I was putting it together that I forgot to paint three of the bottom portions of the table. I plan on doing that in the next few weeks in all the spare time I have (right.)

Here is the finished table with both side leaves down 

The paint is latex enamel and it is truly really strong and I think it will last for a long time.
I love the size of the table too. With one leaf up we can all sit at it and have enough room. With the other leaf up it will be great for bigger projects. I am so pleased with the finished product. So if anyone ends up pinning this or trying this, know that a refinishing project is truly a blessing but it is A LOT of work, especially if you are going to have to strip paint off first. I knew if I just spray painted over what was there it would peel off in 6 months or the minute it got scrapped by one of the boys.

Here are the before and after photos:
Before

After


Thanks for reading! Sorry for the sarcasm but I really did think this was going to take two weeks. I am a bit cynical after it taking the whole summer. I am grateful though because through hard work comes blessings.
~Blessings~

June 25, 2012

I Created!

This post has been a long time coming. My original post about "creating" was in February of this year.  You can find it here. I knew when I committed to "spruce up" the school room that it would take months to do just a little sewing. As much as I wanted to sit down for hours at a time and just get it done that didn't happen.  Life happens. That's OK though.  I enjoyed myself and rekindled my joy in sewing.  My machine hasn't gotten this much use in years!  It was nice to enjoy some of my evenings after the boys went to bed doing something crafty.

To spruce up the school room I updated the bulletin board, upgraded and brightened up the curtains and made two book shelf covers so it didn't look so cluttered with all the books and school stuff showing.

I can't wait to show you!  Are you ready for the before and after shots?

Let's start with the bulletin board.  I have had this bulletin board since I was in high school!  It is worn and faded.  Here is the before shot:

And After...


I painted the outside edge red and added the green polka dot material to cover the cork.  I used white thumbtacks to stick it to the board. Pretty simple but I did have to do several coats of red and I also sewed an edge around the green fabric so it looked finished.  I like how it turned out. Corbin says he can't wait to put his artwork on it.

The before picture of the bookshelves... nice and cluttered...


And After...


These took quite a bit of time.  Measuring and cutting and sewing the bias tape on was a process. I didn't have a pattern for anything I did.  I just created it myself so that took a bit more time.  I really love how they cover the shelf though. It brightens up the room and makes it feel a lot less cluttered.  I also organized the shelves and bought some containers to put certain items in.  They are all labeled and now Corbin and Cody know where to go to get certain supplies.  The bookshelf covers don't have a back.  I just made part of the material hang over the back of the shelf and sewed velcro to the material and adhered the velcro backing to the back of the shelf. It is great because they are removable and washable if needed.

And last but not least the curtains...before...


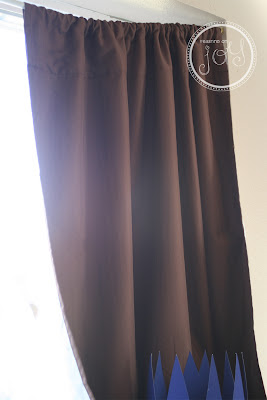
And after...


I wanted to keep these curtains because they are thick and keep the cold out during the winter.  This level of our house is underground (we live in a tri-level) so it gets cold. I purchased a new curtain rod and Steve made some custom hangers for it. (Sorry no pic) I sewed layered circles all over them.  I love how the circles are rough and not perfectly round or perfectly sewn in a circle. I sewed some stripes at the top because the original seam lines on the brown part for the facing panels weren't even.  The stripes added some color and made everything look symmetrical. To finish the curtains off I sewed some green bias tape to the bottom of the panels. Corbin really likes them. I like them because they are feminine but not feminine like flowers.  They fit in a boys school room well (in my humble opinion.) :-)

Here is the school room before...

All mucked up and messy...

And after...


I am happy with the results.  I am still trying to figure out the school table situation.  Do I want a round table or rectangle like before.  After all I will have one new student this year! We need to make room. This makeover does get me excited to start school in the fall in a more organized and fun room though.  Our cat, Max likes to sit in the window in the mornings and get the sun beams and we love to come down in the bright sunlight and do fun things like drawing and crafting!

Thank you for being patient! Like 4 months patient....  I knew it would take a while to see the before after results and I am so glad I get to share them with you!

On my sewing agenda next - stuffed animal clothes for Corbin's animals.  I just finished making Cody some curtains for his room too! I have to fit in scrapbooking somewhere as well.  Cody's baby album is dying to get finished.

What have you created lately?  I would love to hear about it and get inspired.

~Blessings~

February 8, 2012

To Create

Once upon a time I used to create. Craft, sew, paint, draw, and more.  I loved to create. Heck, I even earned a bachelors degree in art (emphasis in graphic design).  Making things and designing things was a daily occurrence. 

Then I had got married and had kids.......

Creating certainly didn't stop but it slowed.  I put most of my extra energy (if there is such a thing) into scrapbooking which I still do and love. I have missed all the other though.  I am determined through this season of life of being a mommy with young ones to use the abilities God has given me and to get back to some of the things I have missed.

I love to sew.  I took a sewing class in high school and it was so much fun.  I used to make dolls, pillows, blankets, window coverings and more!  I am going to put my (rusty) sewing skills to good use starting now!

See this....

This is our school room.  When we moved I had about two weeks until we had to get back to school and so most everything got put away very quickly and not in a really organized fashion.  I have big plans for this school room! I want it to be a bright and colorful, cheerful place that we want to come and learn.  A place that gets our minds revved up!

I am going to start simple (because like I said, is there really "extra " time?)~

I went to the fabric store and got this....

I love this material.  It has so many colors in it and it is not feminine.  Good thing because I am surrounded by BOYS in this house! Even a boy cat!

I am going to use this material to make book case covers for the bookcases you see in the first picture of our school room.  I can't wait!  You will be able to open them from the front but the cute covers will make the room look a lot more tidy and less cluttered.

Look at this....


This is the curtain covering one of the window in the school room.  Obviously first I am going to get a new curtain rod so it hangs properly.  Second I am going to embellish these coverings with the material above and some bias tape I bought.  I plan on putting layered circles on this to brighten it up.

Lastly, I have this bulletin board.... this boring old bulletin board....

I plan on sprucing this up with a bit of paint and some fabric.  We need a bulletin board and this one is still functional it is just plain ugly.

Stay tuned to see if my sewing skills can be put to the test and I can use the newly bought material to spruce up our school room.  I will share my creations.  However, I can't promise how soon I will share.  I am hoping in about a month to have this all done.  I love it.  It really gets my creative juices flowing.

Do you create?  Why not start simple and get back to something that you have really missed doing?  I pray you can!

~Blessings~


Find an older post

For any and all health advice/suggestions and/or posts on this blog, I do not assume any liability for you. The posts and comments on this blog are not meant to be a substitute for your own practicing physician's care in your life. These posts are based on my experience and research in my own healing journey and are placed here to encourage and help those ailing with their health. We are all individuals and there is not ONE pat answer or resolution that applies to everyone across the board.