
To spruce up the school room I updated the bulletin board, upgraded and brightened up the curtains and made two book shelf covers so it didn't look so cluttered with all the books and school stuff showing.
I can't wait to show you! Are you ready for the before and after shots?
Let's start with the bulletin board. I have had this bulletin board since I was in high school! It is worn and faded. Here is the before shot:

And After...


I painted the outside edge red and added the green polka dot material to cover the cork. I used white thumbtacks to stick it to the board. Pretty simple but I did have to do several coats of red and I also sewed an edge around the green fabric so it looked finished. I like how it turned out. Corbin says he can't wait to put his artwork on it.
The before picture of the bookshelves... nice and cluttered...

And After...


These took quite a bit of time. Measuring and cutting and sewing the bias tape on was a process. I didn't have a pattern for anything I did. I just created it myself so that took a bit more time. I really love how they cover the shelf though. It brightens up the room and makes it feel a lot less cluttered. I also organized the shelves and bought some containers to put certain items in. They are all labeled and now Corbin and Cody know where to go to get certain supplies. The bookshelf covers don't have a back. I just made part of the material hang over the back of the shelf and sewed velcro to the material and adhered the velcro backing to the back of the shelf. It is great because they are removable and washable if needed.
And last but not least the curtains...before...
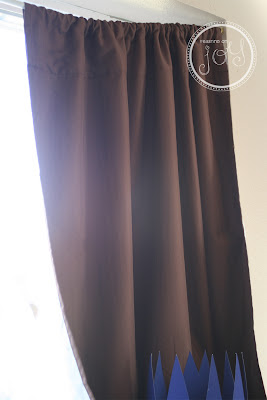
And after...


I wanted to keep these curtains because they are thick and keep the cold out during the winter. This level of our house is underground (we live in a tri-level) so it gets cold. I purchased a new curtain rod and Steve made some custom hangers for it. (Sorry no pic) I sewed layered circles all over them. I love how the circles are rough and not perfectly round or perfectly sewn in a circle. I sewed some stripes at the top because the original seam lines on the brown part for the facing panels weren't even. The stripes added some color and made everything look symmetrical. To finish the curtains off I sewed some green bias tape to the bottom of the panels. Corbin really likes them. I like them because they are feminine but not feminine like flowers. They fit in a boys school room well (in my humble opinion.) :-)
Here is the school room before...

All mucked up and messy...
And after...


I am happy with the results. I am still trying to figure out the school table situation. Do I want a round table or rectangle like before. After all I will have one new student this year! We need to make room. This makeover does get me excited to start school in the fall in a more organized and fun room though. Our cat, Max likes to sit in the window in the mornings and get the sun beams and we love to come down in the bright sunlight and do fun things like drawing and crafting!
Thank you for being patient! Like 4 months patient.... I knew it would take a while to see the before after results and I am so glad I get to share them with you!
On my sewing agenda next - stuffed animal clothes for Corbin's animals. I just finished making Cody some curtains for his room too! I have to fit in scrapbooking somewhere as well. Cody's baby album is dying to get finished.
What have you created lately? I would love to hear about it and get inspired.
~Blessings~


THIS is wonderful!!! I really love the rough dots on the curtain, and the shelf covers are genius. As far as the table goes, have you considered a kidney shaped table? Those were my favorite teaching, because the teacher is right next to all students. Thank you for sharing!
ReplyDeleteJen, that is a great idea about a kidney shaped table! I will have to check into that. Thanks for your comments!
ReplyDeleteIt looks so fantastic- I just love the little layered circles on the curtains- what great idea! That and the storage covers- such a great idea!
ReplyDelete